Are you having trouble with custom styling on a button in your Shopify store? If so, don’t worry, you’re not alone. Many Shopify store owners encounter similar issues when trying to customize their store’s appearance. Fortunately, there’s a solution!
One of the best things about Shopify is its flexibility and ease of customization. However, with all of this flexibility comes the possibility of things not always going as planned. If someone has added special styling to a button on your Shopify store, it can be frustrating trying to locate where to make changes. Luckily, there’s a simple solution to this problem.
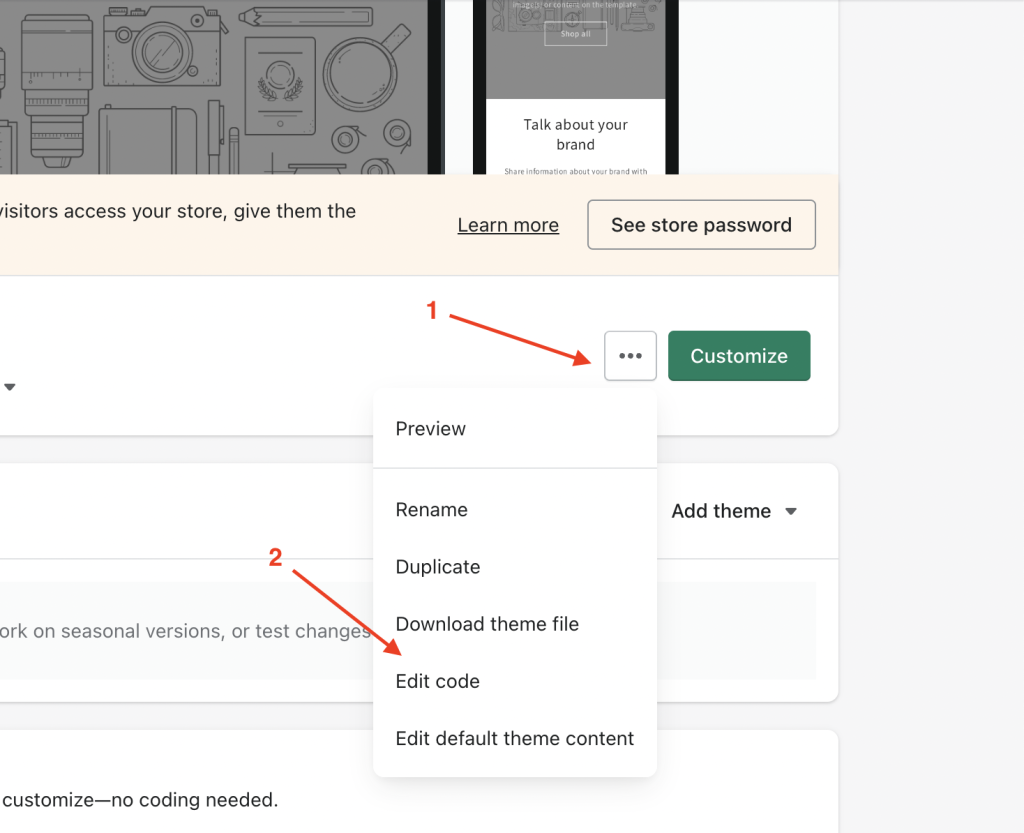
To make changes to the styling of a button on your Shopify store, you’ll need to access your store’s theme code. You can do this by going to your Shopify dashboard and clicking “Online Store” in the left-hand menu. From there, select “Themes” and then click “Edit code” next to the theme you’re using.

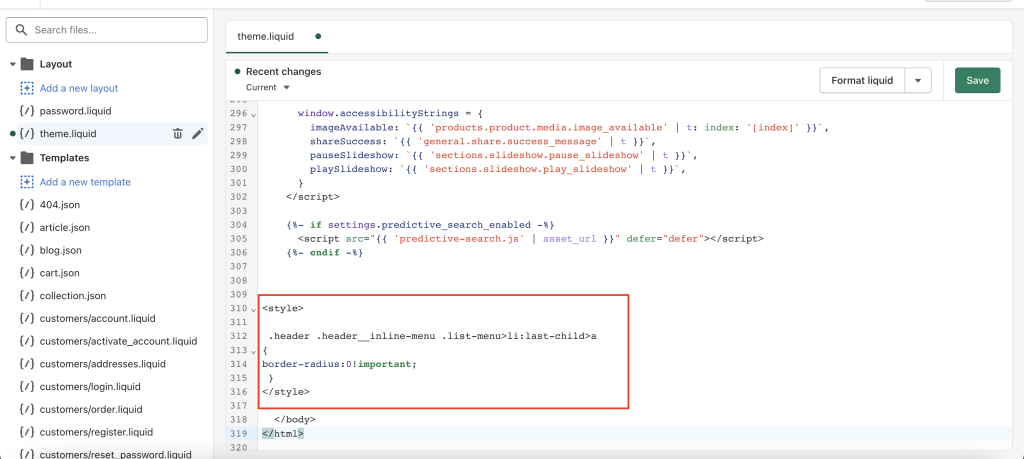
Once you’re in the code editor, you’ll need to locate the “theme.liquid” file. This is the file that controls the overall structure and layout of your Shopify store. You can find it by searching for “theme.liquid” in the search bar.
Once you’ve found the “theme.liquid” file, you’ll need to add the code provided by the person who added the styling to the button. Simply copy and paste the code above the </body> tag in the “theme.liquid” file.
<style>
 .header .header__inline-menu .list-menu>li:last-child>a
{
border-radius:0!important;
 }
</style>
After you’ve added the code, save your changes and check your store to see if the button styling has been updated. If it hasn’t, double-check that you’ve added the code correctly and saved your changes.
In conclusion, if you’re struggling to locate where to make changes to special styling on a button in your Shopify store, accessing the “theme.liquid” file is the solution. It’s a simple process that can save you a lot of time and frustration. Remember, customizing your Shopify store’s appearance is a great way to make it stand out and attract more customers.
